Thursday, December 12, 2013

Christmas Foods that Kids can Prepare

Christmas is a holiday where the entire family tries to get together. Sweet smells waft from the kitchen as those with the talent prepare meal after meal to everyone's delight. If you have kids, get them in on the Christmas cooking craze.

It is a common myth that kids don't want anything to do with the kitchen. In fact, kids love to cook. How do you think we got so many wonderful chefs in the world? When you invite them in and give them something to do, kids will jump at the chance to cook in the kitchen.

No matter what you are cooking (or baking) in the kitchen, the key here is cleanliness. In preparation, buy your child their own apron. Aprons will protect their clothing, giving them a place to wipe their hands. Also, keep plenty of paper towels and hand soap available as they will be washing their hands quite a lot.

Baking is the easiest thing to start with. Let your kids cut their culinary teeth on breakfast. Biscuits are a favorite place where they can learn and not get in trouble for making a mess. As you go from step to step, explain to your kids what you are about to do.

Baking involves most of the work to be done away from the stove. You can set up a work area on the kitchen table or the counter if your kids are tall enough. Let them create there while you prep the stove for the food.

For any recipe, begin by gathering your ingredients and utensils. It will feel like a kitchen show; your kids will love that. Show them how to do each step and then let them take over from there.

We mentioned biscuits before. Anything that goes into the oven is a good start for kids:

  • Christmas cookies
  • Breakfast casserole
  • Cakes
  • Rolls
  • Dinner meats

With the dinner meat, you will have to help them carry it to the stove, but they can pour the brown sugar glaze (if you like that) onto the ham, season the outside of the turkey, sprinkle pecans on the sweet potato casserole and many other small tasks.

Your kids will get the hang of baking and stove-top cooking with a little assistance. The holidays are a relaxing and jovial time to let your kids begin cooking with you. Teach them the basics of hygiene, preparation and creating so they will want to cook all of the time.

Wednesday, December 11, 2013

Christmas Cooking: Creating Christmas Sweets to Die For

natural recipes christmas sweets
What is the one thing everyone enjoys at Christmas time? Arguably it could be sweets. There is nothing like a cookie, slice of cake or gum drop around the holidays. Here are some tips to make sure that those delectable morsels are just as tasty as their sugarplum visions.

Working with Chocolate

When you create a recipe that calls for chocolate, it is so easy to go wrong here. Instead of using the store-bought chocolate syrup, make your own. Buy the chocolate bricks and melt them yourself. Keep the heat under the saucepan low so that the chocolate doesn't burn while it melts.

Dark chocolate is the new healthy chocolate for the 21st century. It is full of antioxidants and great taste. Use it for decorating cakes, cookies, breads and pies. Use some of that melted chocolate in a plastic bag to pipe out all sorts of cool designs onto wax paper. Once they cool, you can carefully place them on any dessert that you wish.

Butter

The rest of the year, this word gets sneer and jeers, but at Christmas, it is spot on. There is no substitute for using regular butter in your dessert recipes. Well, there is but it won’t give you the same taste or texture in your sweets. To compensate, eat a little less of each dessert, but by all means taste them all.

When working with margarine, part of it is water. It says that on the box. Water evaporates when baking and can partially dry out your recipes. Butter is also creamier when softened and whipped. It keeps your cakes, breads, cupcakes and cookies moist like they need to be. Unless the recipe calls for stiff butter, let it come to room temperature on the counter before using.

Fruit

Apple pies, peach cobblers and blueberry blintzes are all great during the holidays. Fruit can be expensive since most of your choices are out of season. If you can’t find fresh at a reasonable price, opt for frozen choices. It’s as close to fresh as you can get.

If you keep your fruit in the fridge to prolong freshness, make sure that you allow them to come to room temperature before using them in delicious dessert recipes. Fruit will juice better when warm. Scalding fruits with removable skins helps the skin to peel off easier so you don’t have to ruin the look of the fruit doing it the hard way.

Here are just a few tips for creating those desserts your family will love all holiday long. Christmas is the one time of year that they don’t want you to skimp on flavor or presentation.

Friday, July 19, 2013

Harvesting the Benefits of Green Smoothie with Almond Milk

green smoothie with almond milk
Green smoothie lovers have found a great way of making their drink more fun. Concocting green smoothie with almond milk is just another mean of enjoying the delectable drink without guilt. It tastes like marzipan reminding us of our childhood days when birthday cakes and all those sweet treats made us shriek with delight. This healthy drink is made healthier with all the benefits almond can give.

Almonds are edible nuts with extensive health benefits that can be enjoyed by people suffering from heart disorders, constipation, impotency, diabetes, respiratory disorders, and coughs. Almond extracts are also found as valuable ingredients in products used to maintain healthy skin, hair, and teeth. The highly nutritious nut is a tiny well of vitamin E, calcium, magnesium, iron and phosphorous. It is one of most nutrient-packed nuts containing zinc, copper, niacin, and selenium. With all these substances, people proactively add almonds in their diet, including green smoothie with almond milk.

Based on research, here are some of the benefits to be gained from almonds:

  • It is good for the brain – Almonds contain many nutrients beneficial to the human brain. They are considered an essential food ingredient ideal for growing children to help develop higher intellectual level.
  • It regulates cholesterol level – Regular consumption of almonds balances the level of HDL (high-density lipoproteins) and LDL (low-density lipoproteins).
  • It is good for the heart – The presence of protein, potassium, healthy fats, and magnesium in every piece of almond help in maintaining a healthy heart. The high amount of antioxidants found in almonds help reduce homocysteine, the cause of fatty plaque build-up in the arteries thus it greatly prevents the occurrence of heart attacks.
  • It cares for the skin – Almond oil is recommended for use with infants. Its vitamin E content is a known to be beneficial to skin that is why almond milk is usually found in skin beauty products such as soap and lotion.
  • It is good in pregnancy – Almonds are great source of folic acid, and essential nutrient that helps reduce the incidence of deformation among newborn babies.

Traditionally, almonds are eaten raw or cooked. However, they can be extracted to produce oil to flavor food as well as almond milk that can serve as a delicious beverage and a healthier alternative to dairy products. It is best for weight loss. The great amount of mono-saturated fat in almonds can satiate the appetite and prevents one from overeating. A recommended ingredient for obese and weight-watchers, green smoothie with almond milk is a good low-calorie diet for shedding the excess pounds. The following is a simple recipe that can be prepared if you want to have smoother skin.

Almond Milk Green Smoothie Recipes

Ingredients:

  • 1.5 cups water
  • 1 cup almond milk
  • 1 cup tightly packed kale
  • 1 cup peaches
  • 1 piece ripe banana
  • 1 cup oats (use raw oat groats if following a raw food diet or oatmeal if there is no high powered blender)
  • 1/4 cup apricots (or any other dried fruit)
  • 1/4 cup ground almonds

Combine all ingredients gradually one after the other in a blender. Add water if the blended ingredients become too thick. If the smoothie has turned too warm, add cold water or ice cubes into it. Preparation is only five minutes before two people can enjoy the thick smoothie.

Smoothie lovers are quick to advocate the value of green smoothie with almond milk. It is more nutritious than yogurt or milk, and when combined with fresh fruits and vegetable ingredients, almond milk adds more nutritional benefits that people cannot be wrong in making green smoothie the path to a healthier lifestyle.

A Heavenly and Creamy Fare Using Fresh Coconut Milk

fresh coconut milk
Coconut milk is very common if you are from the Southeast Asia – Thailand, Malaysia, Indonesia, Singapore, and the Philippines – or from Brazil, Caribbean, Polynesia, and Pacific islands. The liquid is extracted from the grated matured meat of a coconut. The color and rich taste of the milk can be ascribed to its high oil content. Fresh coconut milk is a very popular ingredient to the exotic cuisines in the tropics and the islands.

Use Coconut Milk Like Milk, Creamer, or Yoghurt

The coconut milk extracted fresh from matured fruits has a consistency and mild sweet taste comparable to cow’s milk. If it has been extracted properly, it is not supposed to have any coconut odor. For those who like the fresh taste of coconut milk, it makes a delicious creamer or as a milk substitute in tea, coffee. It can also be used in baking by vegetarians, vegans and by people with lactose intolerance. As a yoghurt substitute, it can be mixed with fruits and other dishes.

Making Savory Curries With Coconut Milk

Curry is a foremost cooking ingredient to many cuisines such Thai, Indonesian, Malaysian, and Sri Lankan. Fresh coconut milk makes the best base for the curry sauce. This is prepared by cooking the coconut milk first at high heat to break down the milk that will cause the oil to separate. The curry paste, which can be a blend of several spices, is then added including the other seasonings and ingredients.

Serabi cakes, a staple in Indonesia is simply rice flour cooked in coconut milk. In Brazil, it is a common ingredient in Northeastern cuisine. Seafood like lobsters, shrimps and fish, stews and desserts can be made more mouth-watering with coconut milk.

Extracting Fresh Coconut Milk

While you can use canned coconut milk, nothing compares to freshly squeezed coconut milk. Homemade versions are richer in flavor and contain more vitamin C, Vitamin B–complex, and Vitamin E. With the growing popularity of South East Asian cuisines, more and more people are coming to love the taste of freshly made coconut milk.

Making coconut milk is easy when it is done properly. In the Philippines, homemade coconut milk is done by grating the coconut kernel using an improvised grater made especially for this purpose. Those who want convenience can buy coconuts in the market where grating is provided as a free service. The grated coconut can also be pressed to extract the rich milk. Otherwise, the milk from the grated coconut is done by adding water and manually pressing it at home. The amount of water determines the thinness or thickness of the coconut milk.

Raw Fish Kinilaw

This dish can be made more exciting with regional variations. In certain places, the flavor is enhanced by adding grilled ‘liempo’ (pork cut from the upper thigh) while in another region the additional ingredient is salted egg (a Filipino version of century egg).
  • Clean and cube 1/2 kilo of fresh fish like tuna or malasugue. Keep it chilled while the other ingredients are being prepared.
  • Finely dice a piece of ginger, 2 pieces of red onion, and 2-4 pieces of chilies.
  • Peel and thinly slice one radish and one cucumber.
  • It is best to make your own coconut milk when preparing this dish. Add 1/2 cup of vinegar to the freshly grated coconut instead of water. Press the coconut to extract the sour milk.
  • Get the chilled fish and put it in a medium-sized bowl. Season the fish with salt and lemon or calamansi juice.
  • Put in the ginger, onion, and chilies. Add the sliced veggies.
  • Pour the sour coconut milk in the mixture. Adjust the seasoning and add more chilies for more heat. Toss and serve cold.
This dish is simple, fresh, and healthy. Try this and enjoy the taste of fresh coconut milk that has been given a twist with vinegar.

Sunday, July 7, 2013

Delicious Homemade Wine Recipes to Impress Your Friends

homemade wine recipes
The popularity of homemade wine making as a hobby has peaked in recent times. Nowadays hobbyists are finding it easier and faster to make their own wine due to the availability of automated devices and a variety of ingredients to be used. Aside from that there are so many homemade wine recipes to choose from the websites, books and magazines. In no time at all, the passion for making homemade wine can be perfected.

If you are just beginning to catch the winemaking fever, it makes sense to start with easy homemade wine recipes complete with instruction guide. Making your own wine using your preferred recipe gives you the opportunity to experiment with it. It also allows you to do some adjustments until the taste and aroma perfectly suit you. Now let us try these at home.

Easy Homemade Wine Recipes from Juice

A primary fermentation container is needed for this recipe. It must be enough to hold four gallons and must be made of heavy-duty plastic material with a lid. Other materials include two pieces of one-gallon glass jugs, hydrometer, an acid meter, large nylon filter, a rubber balloon and a thermometer. This recipe needs one pack of yeast prepared according to package instruction, four cups of white sugar, a single can of thawed juice concentrate and four quarts of cold water. Bear in mind that this recipe does not call for the use of any citrus juice.

Before dipping your hands into it, make sure to sanitize everything. Use the first gallon glass jug to mix the fruit juice with sugar and yeast. Pour in the water. Tie a large balloon over the glass jug. Place the jug in a dark place during the fermentation period. Within two days, the balloon expands as an indication of released gas. The sugar is being fermented into alcohol. At about six weeks or more, the balloon shrinks indicating that complete fermentation has occurred. You now have a homemade wine ready for drinking.

Homemade Wine Recipes Using Grapes

This simple homemade wine recipe needs the following ingredients: 18 pounds of ripe red grapes, a packet of yeast, white sugar, a Campden tablet, and tartaric acid.

The first basic step is to sanitize everything before putting the grapes in the nylon filter bag. Drop the bag at the bottom of the first fermentation container. In mashing the grapes, a crusher can be used or bare, clean hands can do this. Squash the Campden tablet on the nylon filter. Use cheesecloth to cover the container for an hour. When an hour has passed, check the temperature using a thermometer. Take a juice sample from the container if the thermometer reading falls between 70o and 75oF. Use the titration kit to determine the acid level. At this point, melt the yeast in water and wait for bubbles to rise on the surface. Put the solution on the must contained in the nylon filter bag making sure that the mixture is blended well. Put the cheesecloth back and put the container in a warm place.

When the must dried, remove the liquid from the filter bag. Allow some time for the wine to settle before racking into a new sterilized jar. Keep the jug that contains the grape juice for ten days before doing the second racking. Get another sanitized jug and pour in with wine. It takes six months before siphoning can be done after which the wine can be transferred into wine bottles to age some more.

These are only some of the few basic and easy homemade wine recipes that you can try at home. After catching the winemaking bug, you are heading off in trying the more complicated ones. As the saying goes, patience is a virtue. Once you patiently waited and allowed the wine to come out of age soon enough you and your impressed friends can enjoy every drop of the brew.

Gluten-Free Cake, Bread, Pizza, and Pasta Products Are More Available Today

gluten-free products
If you’ve recently been diagnosed with celiac disease or also known as gluten intolerance, you probably have a slew of questions running through your mind. Any kind of change can be really overwhelming. And when the change involves your entire diet, adapting and adhering to it can be a very challenging task. In the past, sufferers of gluten disease had to give up most of their favorite diet treats. Dining out meant having to browse through menus for hours and check out if their food of choice contains gluten. Today, all the hassles of being limited when it comes to food choices are all in the past because there are now a whole lot of gluten-free products like: cake, bread, pizza, and pasta available to individuals suffering from celiac disease.

Living a gluten-free lifestyle is becoming easier than it used to be because of the widespread presence of gluten-free food products in stores nationwide. If you take a trip to the grocery store, you will notice that there are lots of gluten-free cake, bread, pizza, and pasta products on the shelves. As more and more food manufacturers and companies recognize the need to address the growing number of individuals with celiac disease and gluten allergy, more gluten-free food items are showing up on store racks. Such products are aimed at meeting the strict dietary requirements of celiac sufferers and make eating more enjoyable again.

The good news doesn’t stop there. Many bakeries, restaurants, and popular food chains are now also serving such products. Gluten-free cakes, for example, are now available in dedicated gluten-free bakeries. These bakeries only make gluten-free cakes, muffins, pastries, and bread to prevent cross-contamination from other gluten-based foods. What is more, many of these bakeries today will allow customers to select the type of cake to be made. Of course, pre-made cakes are also available and can be directly purchased.

If there is one gluten-free product that will come out as the winner, it is without a doubt the gluten-free bread variety. Ener-G, Kinnikinnick, Glutino, Schar USA, and Three Bakers are just a few of the many manufacturers that produce gluten-free bread. From sliced breads to buns, rolls, and specialty breads, these companies offer them all. One will never run out of choices because even the Internet is now saturated with food stores that offer breads made especially for celiac sufferers. Some even offer free shipping if you order in bulk.

People with celiac disease need not feel frustrated about their pizza cravings anymore. Many popular pizza chains are now serving gluten-free pizza to anyone who needs it. Uno Chicago Grill, Godfather’s Pizza, Garlic Jim’s Famous Gourmet Pizza, Boston’s Gourmet Pizza, and even Domino’s Pizza now added gluten-free pizzas to their menu. Craving for pizza should no longer be a challenge for celiac victims because there are hundreds of pizza chains and restaurants that serve great-tasting pizza without gluten in the crust.

What is life without carbonara, lasagna, bolognese, alfredo, vermicelli, and fettuccini? A good pasta recipe can be really hard to find, especially when you’re avoiding gluten. But, many restaurants now offer gluten-free pasta meals to celiac victims. Today, looking for gluten-free pasta may be as simple as just asking them next time you visit.

Although challenging, following a gluten-free diet is important for healing the intestine in and preventing the reoccurrence of symptoms in celiac patients. Reading food labels is extremely crucial, as wheat, barley and rye is abundant American food products. Most supermarkets are now allocating more shelf space to gluten-free food items. Heaps of gluten-free goods can as well be found in local health food stores. Whole Foods Market, for example, supplies their shelves with a huge selection of gluten-free products.

Also, eating away from home brings its own set of challenges and requires good planning and communication with restaurant servers and manager prior to ordering to determine if gluten-free meals are available in the menu. Although some bakeshops and restaurants offer gluten-free cake, bread, pizza, and pasta products, remember that it’s important to communicate your dietary needs so you can be sure that you’re only getting what is acceptable for your condition.

Cookbooks That Offer Great-Tasting Gluten-Free Recipes for the Whole Family

gluten-free recipes
Who says getting your children to eat gluten-free meals and goodies has to be a chore? Parents of children with celiac disease can possibly raise their kids on a healthy and delicious menu. If you’re a mother who is desperate to come up with delicious meals for your kids, remember that there are hundreds of books that can teach you how to make healthy and great-tasting gluten-free recipes for the whole family. Some are easy to prepare, some may not. But, just like other things, it only needs practice. Now, your family can stay healthy without having to sacrifice any flavor.

1. 125 Best Gluten-Free Recipes

This book by Donna Washburn and Heather Butt features the type of food that is frequently avoided in gluten-free diets. It contains delicious and innovative gluten-free recipes for everything from pasta dishes, appetizers, baked goods, and family meals to great-tasting desserts. These are recipes that the whole family, including children can enjoy. The recipes apply to all, whether one is affected by gluten intolerance or not.

Here are some of the inspired gluten-free recipes you can try cooking at home: Orange Pecan Struesel Muffins, Broccoli-Cheddar Cornbread, Country Harvest Loaf, Thin Pizza Crust, Tomato Rosemary Bread, Fudgy Brownies, Lemon Poppy Loaf, Double Chocolate Cheescake with Raspberry Coulis, and Peanut Butter Cookies.

2. 100 Best Gluten-Free Recipes

Authored by Carol Fenster, this book offers essential gluten-free recipes for everyday favorites like pastas, breads, and desserts. It is a real must-have for those suffering from celiac disease and gluten allergy. This book-compiles the most basic yet important recipes in an affordable and handy package complete with beautiful color photos. With celiac disease and gluten allergy cases becoming more common, a gluten-free diet is becoming more in demand for a growing number of people. This book gives gluten intolerant individuals safe and healthy gluten-free recipes for everyday foods they crave for the most – breads, pasta, cookies, cakes, muffins, pies, and a lot more.

3. Gluten-Free on a Shoestring

It is no secret that gluten-free food products and meals cost three times more than regular items (regardless of taste). If you’re a celiac patient who’s just so tired of spending a top dollar on gluten-free prepared foods, then this book is for you. In Gluten-Free on a Shoestring, savvy mother Nicole Hunn shows how every family can possibly eat delicious gluten-free meals without breaking the bank. Inside this cookbook, you’ll find 125 mouth-watering and inexpensive gluten-free recipes plus the author’s top money-saving secrets.

4. Deliciously G-Free

Elizabeth Hasselbeck, who is also the author of The G-Free Diet and the co-host of ABC TV show The View, offers a vital book about gluten-free food that has easy-to-follow recipes, helpful tips, and color photographs for each. Growing up in a family where everyone enjoys lunch and dinner together at the table, Elizabeth Hasselbeck shares the signature meatball, lasagna, and ziti dishes of her grandmother and great-grandmother, as well as the pierogies of her father’s heritage. However, a couple of years ago, the New York Times bestselling author and mother of three was found to be suffering from celiac disease. Since then, a lot of the recipes served at home became gluten free. This book is intended for people who, just like her, are diagnosed with gluten intolerance.

5. The Gloriously Gluten-Free Cookbook

For celiac disease victims, the necessary diet restrictions can seem like a curse. But, things can be a breeze with a great cookbook. If you’re a sufferer of gluten intolerance, you can still eat most of your favorite foods while maintaining a healthy, well-balanced diet. In this recipe book, Vanessa Maltin compiles Italian, Asian, and Mexican recipes that are safe to consume by celiac patients. The best part is, all recipes taste so good that no one can tell the difference. With the help of other chefs (namely Edgar Steele of Cafe Atlantico, Keith Brunell of Maggiano’s Little Italy, and Katie Chin of Thai Kitchen), Maltin proves that people with celiac disease need not sacrifice flavor to eat a gluten-free meal.

These are just some of the top-rated cookbooks that offer delicious and healthy gluten-free recipes for the whole family to enjoy. People with gluten intolerance no longer has to put up with boring and tasteless meals as there are many recipe books out there that are sure to satisfy their palette in just a few minutes of cooking in the kitchen.

Monday, May 13, 2013

Tiramisu - The Italian Food Dessert

italian tiramisu recipe
Tоdаy TÑ–rаmÑ–su Ñ–s thе mоst pоpulаr оf Itаlіаn fооd dеssеrts.  It grаcеs thе mеnu оf nеаrly еvеry Itаlіаn fооd rеstаurаnt.  Hоwеvеr, Ñ–ts rÑ–sе tо fаmе hаs bееn mеtеоrÑ–c; Ñ–t wаsn’t еvеn Ñ–nvеntеd untÑ–l thе 1970′s Ñ–n thе Vеnеtо rеgіоn оf Itаly.  It dÑ–dn’t еvеn gаіn wÑ–dеsprеаd pоpulаrÑ–ty untÑ–l thе еаrly 1990′s.  It Ñ–s а unÑ–quе blеnd оf Ñ–ngrеdіеnts thаt sеpаrаtеly sееm tо nоt gо tоgеthеr аt аll.  Hоwеvеr, whеn cоrrеctly blеndеd tоgеthеr thеy fоrm оnе оf thе trеаsurеs оf Itаlіаn fооd.

Thе fÑ–rst Ñ–ngrеdіеnt Ñ–s Mаscаrpоnе chееsе.  ThÑ–s chееsе hаs vеry dееp rооts Ñ–n Itаlіаn fооd.  It wаs mаdе аs fаr bаck аs thе 13th cеntury Ñ–n thе rеgіоn оf Lоmbаrdy.  ThÑ–s chееsе Ñ–s cоncеntrаtеd mÑ–lk crеаm аnd hаs а vеry hÑ–gh fаt cоntеnt, gеttÑ–ng up tо sеvеnty-fÑ–vе pеrcеnt.  It Ñ–s а smооth аnd crеаmy chееsе.  TrаdÑ–tіоnаlly Ñ–t hаs bееn cоnsÑ–dеrеd tо bе mоrе оf а wÑ–ntеr dÑ–sh аnd thеrеfоrе shоws up Ñ–n mоrе оf thе sеаsоnаl Itаlіаn fооd dÑ–shеs.  ThÑ–s Ñ–s mаіnly bеcаusе оf Ñ–ts hÑ–gh cаlоrіеs аnd thе fаct thаt whеn Ñ–t wаs fÑ–rst prоducеd thеrе wаs nо rеfrÑ–gеrаtіоn аnd thÑ–s dеlÑ–cаtе chееsе dоеs nоt kееp wеll Ñ–n hоt tеmpеrаturеs.  LÑ–kе mаny оthеr Itаlіаn fооds, thе bеst Mаscаrpоnе chееsе cоmеs dÑ–rеctly frоm Itаly.  Hоwеvеr, Ñ–t yоu’rе аn Itаlіаn fооd lоvеr mаkÑ–ng TÑ–rаmÑ–su аt hоmе, thеrе аrе plеnty оf mаkеrs оf Mаscаrpоnе chееsе Ñ–n AmеrÑ–cа.

Thе nеxt Ñ–ngrеdіеnt Ñ–s Zаbаglіоnе crеаm.  ThÑ–s Ñ–s а truе clаssÑ–c Itаlіаn fооd dеssеrt.  It hаіls frоm thе wоrld rеnоwnеd kÑ–tchеns оf VеnÑ–cе.  Whеn Ñ–t оrÑ–gÑ–nаlly bеcаmе а pоpulаr Itаlіаn fооd dеssеrt Ñ–t wаs mаdе wÑ–th yоlks, hоnеy, аnd а swееt Cyprus wÑ–nе.  Hоwеvеr, tоdаy thе crеаm hаs tаkеn оn а nеw flаvоr.  Tо bеgÑ–n wÑ–th sugаr Ñ–s substÑ–tutеd fоr thе оrÑ–gÑ–nаl hоnеy.  Thе mоst stаtеd dÑ–ffеrеncе Ñ–n tаstе thоugh, cоmеs frоm thе usе оf Mаrsаlа wÑ–nе Ñ–nstеаd оf thе swееt Cyprus wÑ–nе.  ThÑ–s crеаm cаn bе mаdе frоm hоmе аnd Ñ–s еаsіеr tо mаkе thаn mоst Itаlіаn fооd chеfs lеt оn.

Thе thÑ–rd Ñ–ngrеdіеnt Ñ–s thе mоst dÑ–stÑ–nctÑ–vе fаctоr оf TÑ–rаmÑ–su, еsprеssо.  ThÑ–s shоt оf cаffеіnе Ñ–s whеrе thе dеssеrt gеts Ñ–ts nаmе, whÑ–ch mеаns “pÑ–ck mе up”.  ThÑ–s Ñ–s а cоffее thаt Ñ–s truе tо Itаlіаn fооd аnd Ñ–s much strоngеr thаn AmеrÑ–cаn cоffее.  Esprеssо Ñ–s thе mоst Ñ–mpоrtаnt cоffее Ñ–n Itаlіаn fооd аnd cаn bе sееn fоllоwÑ–ng mаny Itаlіаn mеаls.

Thе fоurth аnd fÑ–nаl Ñ–ngrеdіеnt Ñ–s LаdyfÑ–ngеrs.  Thеsе pоpulаr cооkіеs оrÑ–gÑ–nаtеd Ñ–n Itаly аnd hаvе mаdе numеrоus аppеаrаncеs Ñ–n nоt оnly Itаlіаn fооd, but Ñ–n mаny оthеr nаtіоnаl cuÑ–sÑ–nеs.  Thеsе cооkіеs аrе rеmаrkаbly lÑ–ght duе tо thе fаct thаt thе dоugh wÑ–th whÑ–ch thеy аrе mаdе Ñ–s rÑ–ch wÑ–th whÑ–ppеd еgg whÑ–tе.  Thеy аrе Ñ–mmеnsеly pоpulаr аnd оnе оf thе mоst аpprеcіаtеd Itаlіаn fооd dеssеrts Ñ–n Itаly.

Thеsе fоur Ñ–ngrеdіеnts blеndеd tоgеthеr just rÑ–ght аnd tоppеd оff wÑ–th chоcоlаtе mаkе аn Itаlіаn fооd dеssеrt thаt Ñ–s аs pоpulаr аs thе Ñ–ndÑ–vÑ–duаl Ñ–ngrеdіеnts.  Mаkе surе whеn yоu prеpаrе thÑ–s аt hоmе thаt yоu tаkе grеаt cаrе Ñ–n chооsÑ–ng thе Ñ–ngrеdіеnts, Ñ–t wÑ–ll rеаlly mаkе а dÑ–ffеrеncе Ñ–n thе quаlÑ–ty оf TÑ–rаmÑ–su.  Nоw thаt yоu knоw thе cоrrеct quаlÑ–ty аnd thе оrÑ–gÑ–n оf thе Ñ–ngrеdіеnts yоu wÑ–ll surеly Ñ–mprеss yоur frіеnds wÑ–th yоu Itаlіаn fооd knоwlеdgе.

Friday, May 10, 2013

Famous Mexican Desserts And Some Variations

leche flan
“Postres” – the sweets at the end of a meal. Although Mexicans consider these as important meal-enders, Mexican desserts remain highly unfamiliar. Perhaps, this is because they are hidden behind the shadow of the ever-present caramelized custard, known locally as “flan caramelisado”.

Among the many distinct Mexican desserts, the flan caramelisado remains to be the most classic, and is suggestively the best description of Mexican desserts in general. In fact, the most traditional dessert recipes of the Mexicans were discovered when the Spanish colonies ruled the country.

The popularity of the “flan” has spanned several countries all over the globe. Although the terms “flan” and “crème caramel” were derived from the French, the word “flan” however, is used by the French to mean custard tart. Since it is known across Europe, as well as in other parts of the world, “flan” is mostly how Spanish-speaking people call it.

The flan is known to have greatly invaded dessert menus in Europe towards the end of the 20th century because it offers restaurateurs utmost convenience. Since the crème caramel, as Europeans call it, is fairly easy to prepare, and may be made in advance before it is needed, it became one of the most prevalent desserts in restaurant menus.

The flan is not only the most well-known among Mexican desserts, but has also gained as much attention in other countries. There are now a lot of variations, including the use of almond, coconut, lemon, pistachio, and other fruits.

Another proof of its popularity is the fact that has been “imitated”. “Instant flans”, which are available in powder form, use agar as thickening, instead of eggs. “Royal” is among the popular brand name of these flan imitations.

Flan is more widely-known in Spain, as well as in the Philippines and Latin America, both of which were under Spanish rule. Flan has become a lot more common in the United States because it is always a part of Mexican menus.

The pastry ingredients of the Europeans, such as wheat flour, eggs, and milk, and the crepes of the French, were all made part of some Mexican desserts. Up to now, these contributions from other cultures can be savored in the various Mexican desserts like bread pudding, rice pudding, coconut flans, and caramel filled crepes.

Mexican desserts are interesting because they are influenced by the flavors of other cultures, and further enhanced by the Mexicans ‘fascinating tastes.

What Type Of Methods Is Used To Cook Mexican Food


cook Mexican dishes
Mexican foods are cooked similar to how you cook your everyday meals. They can be fried, boiled, and grilled. Mexico has cooked their foods differently in the past.

Long ago, the natives of Mexico did not have ovens like we have today. They would have to cook foods by an open fire pit. They would hold the foods in iron pots and pans. It cooked like how we grill our foods on the barbeque. Before the Spaniards introduced the iron pots, the Aztecs used to steam and boil foods in two-handled clay pots which were called xoctli. The pot was filled with the food and heated over the fire. Frying foods was a popular way to cook. Many Mexican dishes still use this method.

Today in the present, it is a lot easier to cook Mexican dishes. It takes less time to prepare the foods. If someone wants to make homemade tortillas, there are iron pans that make it easy. Flan can be made simple using spring form type pans. Long ago, it was a long process to make masa, which is a dish that includes a certain type of corn that has to be grinded. Nowadays you can purchase a metal grinder that helps grind the masa.

The oven is perfect for making many Mexican foods. It makes cooking vegetables and meats a snap. They can be placed in a pot of water with added spices and simmered for hours. Bigger steaming pots make tamales easier to cook. You can make many tamales and steam them all at once, making it very convenient. Tamales take a long time to make, so big pots are perfect.

Grilling on the barbeque is also a great way to taste authentic Mexican foods. Long ago foods were made this way and called Barbacoa. It consisted of steaming meat that was suspended over boiling water in a deep pit. Before steaming the meat cactus and banana leaves were wrapped around it. These days, barbequing allows the spices and sauces to burst with flavor. It tastes similar to how the food once was cooked over open flames. Fajitas are great on the grill!

Centuries ago, the natives used what was called metate y mano. It was a large tool that was made out of lava rock or stone. The surface was slightly concave. The tool was used to mash the ingredients. Another tool they used to mash ingredients was molcajete. It was mortar and pestle. When cooking, you have to be able to stir. Wooden spoons have been used for centuries and still are. Today different types are available for you to use, depending on what type of dishes you are making. Some are made for stirring thicker foods, while others are thin for stirring foods such as onions and garlic.

Mexican food has a rich history behind it. The methods might have been modernized, but the food is still traditional. Depending on how the foods are cooked, you will taste different flavors and textures. There are many Mexican dishes to cook and enjoy.

Aspects Of California Gourmet Cuisine And Recipes


california gourmet cuisine
California gourmet cuisine is marked by fusion of different culinary influences from Central and South America to Mexico and Asia. Many of the popular cooks of California gourmet cuisine are understood for keeping their dishes easy but impressive, always fresh and carefully equipped using the very best ingredients, generally those discovered locally.

Some typical local active ingredients that are commonly utilized in California gourmet cuisine consist of artichokes, avocados, fresh dates and figs, sprouts and persimmons. Of course, in California gourmet cuisine these ingredients often come straight from the farmer’s market. California gourmet cuisine in the north coastline will feature salmon, oysters and Dungeness crabs whenever these are in season.

While California is the birthplace of lots of prominent fast-food chains it is also the house of top-rated California gourmet cuisine bistros, the most well understood is The French Laundry in Napa Valley. The owner and cook of The French Laundry is the well-respected Thomas Keller. Some instances of California gourmet cuisine served by The French Washing include Surf and Turf, which is a dish of lobster tail and sauted foie gras and Oyster and Pearls, which is a dish of oyster with caviar offered on cozy custard of pearl tapioca.

Because of the variety of California gourmet cuisine, exploring it is an adventure in itself. There are California gourmet cuisine retreats that provide to integrate cooking classes while checking out different aspects that make up California gourmet cuisine such as the vineyards, olive oil producers, ethnic food markets, and farmer’s markets.

Below are some examples of California gourmet cuisine:

California Avocado Fruit Salad

Prepare the dressing by whisking together 2 cups of olive oil, 2 tablespoons each of raspberry vinegar and toasted sliced walnuts, 1 tsp of grated lime peel, and 1 tablespoon each of fresh lime juice and sliced fresh basil leaves, and 1 tsp each of salt, pepper and dry mustard. Set the dressing aside.

Combine 1 10 oz pack of blended child greens, 3 peeled kiwis, cut in half, 2 peeled and segmented grapefruits, and 2 cups of sliced strawberries in a big salad bowl. Pour over the dressing. Toss the salad. Leading with 8 avocado slices.

California Poached Persimmons

Stem 6 firmly-ripe persimmons. Peel, dispose of seeds and cut them each into 8 wedges. Place the persimmons in a saucepan and integrate with half a cup of dry white wine, 3/4 cup of fresh strained orange juice, 1/4 cup of sugar, 1 teaspoon of peeled and minced fresh gingerroot and 1/4 tsp of cinnamon. Bring the blend to a boil. Stir sometimes, cover and let simmer for 15 minutes or until the persimmons become tender.

When the persimmons are prepared, transfer them to a dish making use of a slotted spoon. Boil the syrup till the liquid is about 1/2 cup, and put this over the persimmons. You can serve this dish cozy or chill it and serve over ice cream.

Ballotin De Pralines: The Belgian Gourmet Chocolate


ballotin de pralines
Chocolate is among the humanity’s preferred meals. Kids and grownups alike eat and consume it in different types. Chocolate is so special in fact that an ordinary American eats 4.5 chocolates in a year.

How did chocolate begin? It was the Aztecs who first uncovered chocolate. The very first form of chocolate was a bitter refreshment that was thought about by the Aztecs as the refreshment of the gods. The beverage consisted mainly of the roasted kernel seeds of the cocoa fruit.

It was Christopher Columbus, a Spanish explorer who found the New Globe, who brought chocolate to the Europe. The beverage was extremely costly and only rich individuals in Europe had the ability to manage it. The chocolate recipe was a closely defended key in Spain.

Nevertheless, the success of the beverage was fantastic that the understanding of the recipe and of chocolate itself spread out with all countries of Europe. Each nation began to find ways on how to make their very own gourmet chocolate by adding sugar, milk and other components. This was the birth of chocolate as we understand it today.

One of the most widely known gourmet chocolates on the planet is Belgian chocolate. When it was first introduced in Belgium, it was accepted to be a good gift to offer. Later, in 1912, Belgian confectioneries produced the “praline,” a chocolate filling or icing. To safeguard its fragile taste and nature, it was secured by a packaging with the label “Ballotin.” Therefore, the widely known Belgian gourmet chocolate, or “ballotin de pralines” was born.

What makes this gourmet chocolate special? There are a lot of elements. The cocoa seeds for use in making Belgian chocolates are thoroughly picked. This is especially important for the praline. The quality of the chocolate rests on the cocoa bean’s color, scent and texture.

Belgian chefs then prepare the praline by hand. This is especially true when it concerns enhancing the praline. Each ballotin de pralines is distinct, each has a personal touch.

Aside from being tasty, the Belgian gourmet chocolate is additionally healthy to eat. In fact, it is looked at to be an energy company. It contains important mineral salts such as magnesium and iron.

The praline is also an aphrodisiac, a sexual stimulant. In fact, it is looked at to be the meals item that inflames passions.

Ballotin de pralines is also a very good anti-depression food. Praline contains pheryletylanine, a compound that has a positive action against stressed depression.

Everybody must consume ballotin de pralines a minimum of as soon as. It is not just meals, it is an experience.

The Paleo Diet Food Lists


Following the Paleo diet is all about going back to the roots of our most ancient ancestors and adhering to their diet.  Back when cavemen walked the earth, they were hunters and gatherers eating the freshest of fruits, vegetables, and meats.  With all diets come strict instructions on what you can and cannot eat.  By following the list of foods set forth, you can gain optimal health and nutrition.

Understanding that the Paleo diet is based on the foods that the cavemen ate, you will need to stay away from all foods that are packaged or processed.  In addition, there are certain meats that are on the Paleo diet “do not eat” list because they are considered fatty.  Some of these meats include chicken wings, deli meats, pork sausage, salami, chicken skin, turkey skin, pepperoni, bacon, fatty pork chops, bologna, fatty lamb chops, breakfast sausage, and spam.

Cavemen lived before the age of agriculture. Therefore, they did not eat grains or wheat.  So these kinds of foods fall into the “do not eat” list of the Paleo diet.  Even the grains that claim to be “gluten-free” are not recommended for the Paleo diet.  Other grains on the “do not eat” list include, barley, corn, millet, oats, rice, rye, wheat, and wild rice.  Any foods that are made from these products can not be eaten as well.  These foods include amaranth, bread, buckwheat, cakes, cookies, corn chips, corn on the cob, corn starch, corn syrup, donuts, flat bread, muffins, pasta, pancakes, pita bread, pizza, quinoa, rice cakes, rice flour, rice noodles, rice pudding, rolled oats, rolls, rye crackers, and tortillas.

Many foods are listed on the Paleo diet “do not eat” list.  But there are also many foods that can be eaten and enjoyed.  Those who have experienced and stuck with the Paleo diet have found that there are a great variety of meals that they can eat.  Although cavemen did not eat dairy, they did eat eggs.  You can enjoy an omelet made with two eggs that contains fresh produce like mushrooms, peppers, tomatoes, and onions.  You can also enjoy snacks of fresh fruits and vegetables such as berries, raw carrots, and celery.  You can even snack on guacamole.  However, when you are snacking on fruits and vegetables or enjoying them as a side dish to your meal, eat them without many condiments or sauces on them.  They are healthier this way.  Plus, there are many meats that you can eat.  Look for meats that come from pasture-raised and grass-fed animals.  If that is not possible, choose the leanest cuts of meat to fill your appetite.

The best part of the Paleo diet is that it will eventually slow your digestive process.  You will feel fuller for longer periods of time.  So when you are partaking in the Paleo diet, you should only eat when you are hungry.  Don’t worry if you skip the occasional meal.  Your body will let you know when you are hungry.

Tuesday, May 7, 2013

How To Create Vegetable Juice Recipes


vegetable juice recipes
Many people wonder how they can consume all of the recommended greens in only one day.  Juicing in the answer.  Juicing gives your body a quick way to absorb all of the wonderful nutrients that are contained in vegetables and fruits, because juicing breaks down the cell walls of whole foods.  There is no need to waste energy digesting the foods because juice can be absorbed by your body within twenty minutes.

Juicing is the best way to consume high volumes of greens during the day. Although green vegetables are the most alkalizing, mineralizing, and healthiest foods, they are not always the most flavorful.  But you can mix other fruits and tastier vegetables into the mix to make it taste better.  You can use foods such as apples or carrots for this purpose.  When it comes to creating delicious juices that are also healthy, not only is it a matter of personal preference, but it’s also an exercise for your imagination.  What fruits would taste wonderful together and help you to take advantage of the many vitamins, minerals, antioxidants, and enzymes that fruits and vegetables have to offer?

Juicing is easy to learn and you can make and invent recipes that are easy, tasty, and best of all, healthy.  But there are a few things that you need to remember when juicing.  Make sure to wash all of the vegetables and fruits that you’ll be using.  It is best to purchase produce from a health food store or a local produce market.  If you are buying them from the local supermarket, washing them well will ensure that you have removed any lingering pesticides.  Many fruits and vegetables do not have to be prepared further than cutting them up into smaller pieces to fit inside the juicer.  However, most pits and larger seeds will need to be removed, in addition to the rind from some citrus fruits such as oranges and grapefruits.  Many melons can be juiced with their peel and all.  It is best to investigate how each fruit and vegetable should be juiced before you attempt to use it in a recipe.  When creating a juice recipe, make sure to use your imagination and try new combinations of produce.  Keep in mind that you should juice the soft fruits and vegetables first.  Then juice the harder and tougher ones like carrots.  The tougher ones will push the softer ones through the juicer.

Nothing is more energizing than a quick glass of home-made juice.  Juicing only takes a few minutes to do, but will offer your body huge benefits for a long time -- such as weight loss and assistance to cure and prevent common health issues.  With juicing, there is no cooking, no pans to scrub or time wasted eating a meal.  Juicers are relatively quick and easy to clean so you can get on with your day. Juicing does not have to consume your life.  Drinking just one glass of fresh juice a day will give you energy and perk up your spirits.

How To Prepare Delicious Raw Green Smoothies?


raw green smoothie
Raw green smoothie is nothing but a blend of fresh fruits and vegetables. It is taken as a juice which is rich in nutritional values. It provides more energy and strength as compared to fruits and vegetables eaten raw.

Raw green smoothie is very easy to prepare. The most important thing which is required is the correct equipment to blend the fruits and vegetables. If the individuals have just started drinking the green smoothie drink then they should maintain the fruits and vegetable ratio as 60:40. As they will get used to it they can reverse the ratio and include more of green vegetables in their diet.

Now the next question which arises in our mind is what kind of fruits and vegetables to be used for green smoothie. Usually all types of green vegetables will do, but people prefer more of spinach and lettuce in the starting. It is recommended that the vegetables should be rotated well in the blender. The individuals who have just started with the green smoothie can start with spinach as it doesn’t have any specific taste.

About the fruits, we can use any type of fruits in the smoothie. Once the fruits and vegetables are decided they are put into the blender and mixed with water. After mixing them, it is wise to first taste the smoothie and figure out what is missing. If the individuals want it to be sweeter then they can add honey or more ripe fruits to it. If they want it more liquid then they can add water to it. If you want the smoothie to be more energetic then add more green leafy vegetables to it.

It is advisable to drink the smoothies in breakfast. Having a green smoothie is the best substitute for other breakfast items. The individuals can also prefer to have the smoothie during lunch as well. It will help in boosting their energy and will relax their mind. Green smoothies also provide many other benefits like weight loss, quick healing of injuries, acts as sugar stabilizer, cures chronic illness like diabetes, heart diseases, asthma etc.

These green smoothies are enriched in nutrients which nourishes our body. Drinking green smoothies regularly increases our carving of green vegetables. It reduces our interest towards junk food intake as well. So introducing green smoothies is the best way to have a balanced diet.

Monday, April 29, 2013

Coming up with the Best Guilt-Free Dessert


best guilt-free dessert
Through time, some of the best-loved desserts have remained the same: chocolate cake, chocolate chip cookies, apple pie, pumpkin pie and a host of other favorites. Because of this, the search for the best guilt-free dessert does not necessarily lead to new creations; it can take us to new versions of classic sweets.

Today there is greater awareness of the connection between what people eat and the condition of their bodies. There is a significant push to encourage people to develop better eating habits and this effort has spread to the area of desserts. The two recipes made available here are products of the effort to have healthier desserts without sacrificing taste. Do try them and see which one will help you come up with the best guilt-free dessert for you.

Chocolate Chip Cookies

If a popularity contest were held among sweets and cookies, chocolate chip cookies would probably be on top of the list. Here is a recipe you can try and enhance so you can arrive at your own best guilt-free dessert.

Ingredients:

  • 2 1/4 cups whole wheat flour
  • 1 teaspoon baking soda
  • 1 cup butter-flavored margarine, softened
  • 3/4 cup artificial sweetener mixed well with 2 teaspoons maple syrup
  • 1/4 cup artificial sweetener
  • 1 package instant fat free and sugar free vanilla pudding
  • 2 eggs
  • 1 teaspoon vanilla extract
  • 2 cups semisweet chocolate chips
  • 1 cup chopped walnuts or pecans

Procedure

  1. Preheat oven to 350 degrees Fahrenheit.
  2. Sift together flour and baking soda, set aside.
  3. In a large bowl, cream together the margarine, the sweetener and maple syrup mix, and the artificial sweetener.
  4. Beat in the instant pudding mix until blended then stir in the eggs and vanilla.
  5. Blend in the flour mixture.
  6. Mix the chocolate chips and nuts.
  7. Drop cookies by rounded spoonfuls onto sheets line with parchment paper.
  8. Bake for 10 to 12 minutes till edges are golden brown.
Banana Cream Pie

Banana cream pie is usually sinfully rich but this version is a lighter and healthier alternative. This is certainly good news for those who love this dessert. Do try this recipe and add your own personal touches. See if it is too sweet or not sweet enough and try adding a dash of cinnamon or nuts in the crust. You may want to use a low calorie Graham cracker crust instead of the regular pie crust. You can make a lot of changes to make sure the dessert is enjoyed to the fullest in your table.

Ingredients:

  • 1 (9 inch) deep dish pie crust, baked and cooled
  • 1/3 cup artificial sweetener
  • 1 teaspoon maple syrup
  • 1/4 cup cornstarch
  • 1/2 teaspoon salt
  • 3 cups low fat milk
  • 4 egg yolks, beaten
  • 3 tablespoons butter flavored margarine
  • 1 large banana, sliced
  • 4 egg whites
  • 1/4 teaspoon cream of tartar
  • 1/2 cup white sugar
  • 1/4 teaspoon vanilla extract
Procedure:

  1. Preheat oven to 400 degrees Fahrenheit.
  2. In a large saucepan combine sugar, cornstarch and salt then stir in milk and egg yolks. Whisk all these ingredients together until thoroughly combined.
  3. Cook over medium heat while stirring constantly until mixture is thickened. Remove from heat and stir in butter flavored margarine and vanilla.
  4. Pour half of custard into baked pie shell. Arrange sliced banana over the custard then spread remaining custard over banana layer.
  5. In a large mixing bowl, beat egg whites and cream of tartar until foamy. Gradually add white sugar and beat until stiff peaks form. Spread meringue over pie, making sure the edges are covered.
  6. Bake in at 400 degrees Fahrenheit for 10 to 15 minutes, or until lightly browned. Cool completely before serving.

Wednesday, April 24, 2013

What Kind of Cakes Are in Mexico


Mexico has their share of sweets. You can find sweet drinks, to candies and chocolates, and of course cakes. One cake that is popular and simple to make is the Mexican Chocolate Pound cake. What makes this cake a classic is the addition of Mexican chocolate and cinnamon. It is simple to make and very tasty!

If you crave for something lighter, Tres leches cake is perfect. Translated into English it means "cake of three milks". It is a butter cake that is soaked with three different types of milk; condensed, evaporated, and whole milk. Because the cake doesn't usually include butter in the milk, it contains a lot of air bubbles. The top of the cake can have fruit such as raspberries to add extra flavor. This cake is common many parts of Latin America. The origin is not surely known, but is thought to be between Nicaragua and Mexico, where the cakes were found the earliest. Tres leches cakes are great at parties and other special celebrations.

As you know, Mexico loves its spices. Chili and jalapenos are sometimes added to chocolate cakes. You might think it would taste weird, but it adds a unique flavor. The Mayas used chili with cocoa for many years. One particular cake that has a touch of spice in it is Chocolate Jalapeno cake. Every ingredient is typical to what you would see in other chocolate cake recipes but this particular cake calls for finely chopped jalapenos.

Another popular cake that is made in Mexico is called Rosca. You will have to wait until the holiday season to find it though because it is a cake that is made around December until February. It is made into a circle shape that represents the crown of the three kings. The cake is flavored with lemon and orange zest and contains almonds. The top of the cake usually is colorful with fruits. Inside of the cake is one of two miniature statues of the baby Jesus. A party that is held on the three kings day includes this cake. Everyone will cut the cake hoping they are not the one who finds the doll, because it they do, they have to make foods for another celebration that is held in February. The cake can be bought at local bakeries, or made from home, with the baker putting the dolls in themselves.

If you have a love with crepes, why not try them Mexican-style? The crepes are topped with Cajeta, which is Mexico's version of caramel sauce. The crepes are also topped with toasted pecans. Other toppings can be added if desired.

If ever having a fiesta, try baking a cake. Some cakes have tropical fruits in them, while others are richer and contain cinnamon. Whatever you enjoy in other cakes, you will find in Mexican style ones. To make sure the cake is authentic, purchase actual Mexican cocoa and follow the recipe accordingly. It is sure to be a big hit at your next celebration!

All About Risotto in Italian Food


authentic Italian food risotto
There is really no definitive answer as to how rice arrived in Italy.  However, as soon as it made its way to Italy in the fourteenth century, most likely from Spain, it became a hit in Italian food.  Areas of the country outside of Milan have the perfect blend of flat land, water, and humidity to make rice cultivation a very successful endeavor.  The intensive rice cultivation that began in the fourteenth century has continued and has made rice a staple in regional Italian food.

Perhaps the most popular example of rice in Italian food is in risotto.  Although risotto is considered a very serious dish in Italian food, it actually started out as a joke.  As the legend goes a young apprentice was staining the glass used in the Duomo di Milano, a magnificent gothic cathedral, in 1574.  He was relentlessly teased because it looked as if he had added saffron to pigments in order to obtain more vibrant and brilliant colors.  When it came time for his master's wedding, he decided to play a little joke to show how tired he was of the teasing.  So, he added saffron to the rice that was to be served at the wedding.  The plan backfired and the rice was so popular amongst the wedding guests that it became the staple of Italian food that we know today.

There are four main components to the risotto we know in Italian food today.  The first is the soffritto.  Sometimes this can be special ingredients specific to the type of risotto being made.  However, it is typically a mixture of vegetables, butter, oil, and onions.  This mixture is sautéed in the same skillet where the rice will later be cooked.  The next component is the broth.  The broth can be homemade or canned and can be beef, chicken, vegetable, or fish.  The third component is the flavoring ingredient.  This is the component that will give the risotto its specific flavor.  This can range from vegetables to meat, truffles, or the ingredient that started it all, saffron.  Now of course, the final component is Italian rice.  The rice that is used in Italian food is made up of large grains with lots of starch.  This rice is perfect for risotto because it can absorb large amounts of liquid and still remain firm.

Risotto is a very popular Italian food dish, but it is also one of the most botched Italian food dishes because of the precise way in which the rice is prepared.  Some tips to making it successfully at home include not washing the rice.  If you were to wash the rice beforehand it would eliminate much of the starch that is needed to make good Italian food.  There are also different types of Italian food rice and you will want to pick the rice that is most appropriate for your recipe.  All rice is not created equal so check your recipe and cookbooks to decide which rice is best to use.  You'll also want to use a double-bottom sauté pan.

This will keep the heat uniform to make sure the rice cooks evenly.  It is important to sauté the rice until it is toasted before adding the broth.  However, don't cook it too long or it will harden.  This is the most important part of making an authentic Italian food risotto, make sure the rice is toasted.  After that it is all downhill.  Just follow these tips and pretty soon you'll be cooking like a professional Italian food chef.

Tuesday, March 26, 2013

Create Dazzling Delicious Gourmet Fresh Fruit Salads


gourmet fruit salads
If you enjoy making fruit salads as part of your summer fare during picnics and family get-togethers, you’re going to love the suggestions we have for you here. Knowing how to combine  the right blend of fruits in a salad, either alone or with other ingredients, is the first step to creating fruit salads that impress and delight your guests.

Combine Ingredients that Compliment

Certain fruits are better candidates for a combination of greens and fruit salad, but that doesn’t mean you can’t experiment a little to find new flavors you enjoy. Summer melons like honeydew and cantaloupe are always good, but a number of different fruits and berries are equally compatible with some basic greens such as romaine lettuce or other mixed varieties. Consider adding, for instance, grapefruit segments to add zip and zing to an otherwise traditional spinach salad. It’s all about the flavors playing off each other.

If it’s just fruit in the salad you’re making, the sky’s the limit as to what you might combine for a delicious treat with your meals. Lots of different berries are in season in the warmer months, so consider adding two or three different varieties to a more basic fruit salad made with bananas, apples, and grapes. A little splash of freshly squeezed lemon juice will help keep everything fresh.

Stick with a light dressing, like a vinaigrette that’s not too strong or too sweet. This will allow the tartness and sweetness of the strawberries, mango, peaches, cranberries, or whatever you use to come through in the salad. And, don’t forget the texture. Adding some roasted almonds adds a bit of crunch and depth in flavor to this type of salad creation. The salty flavor of the nuts also compliment the sweetness of the fruit. Using opposing flavors will often ‘marry’ the ingredients together, creating a perfectly blended compliment of flavors.

Create Interest With One or Two Surprising Ingredients

You only need a slice or two of an exotic, unusual fruit to create excitement in a salad. Star fruit, dragon fruit, dates, apricots, figs, and papaya are just some suggestions, and they don’t have to be considered a dessert salad either. Combining one or two of these fancy fruits in a mixed green salad, chicken salad, tuna salad, shrimp salad, crab salad, or meat based salad could create quite a buzz at your next dinner.

Remember, there’s also a selection of spices and herbs that do wonders to perk up a fruit salad. And don’t just think about sweet spices like cinnamon, ginger, nutmeg, cloves, and allspice. Mixing hot pepper flakes or chili powder with sweet ingredients often is the perfect compliment. Savory herbs like rosemary, dill, and thyme are also surprising when used to enhance fruit salads.

When Presentation Matters the Most

Special occasions may call for a salad that looks as good as it tastes. This is where you employ additional ingredients and combine colors and layers to make a presentation and a statement with your delicious creation.

Use a melon baller, for instance, to scoop up delicate pieces of the melons you choose. Then, include layers of color with blueberries, blackberries, sliced cherries, or raspberries. Garnish your fruit salad with lemon balm or mint leaves for extra color. Other fruit favorites include fresh pineapple, kiwi, or tangerine slices. Think about shapes, sizes, and color, then mix and match for a salad that looks as good as it tastes.

Mixing fresh fruit with creamy layers of vanilla pudding is another pretty salad to serve guests for a special dinner party. Add a little whipped cream and a maraschino cherry on top for a final touch. A similar look is possible by mixing cream cheese and condensed milk together for the base that holds your favorite fresh fruits.

Drain your fruits well before combining them, then you can even make a gourmet version of the  old fashioned fruit salads found on holiday tables many years ago.  Make it gourmet by using crème fraiche and lots of fresh fruit, including berries, and even roasted nuts.

These suggestions are just a quick look at the possibilities for making gourmet fruit salads using your imagination and good taste. Having a healthy appetite for adventure will spur on the type of creativity you’ll need to make splendid fruit salads that are an unexpected pleasure.

Monday, March 25, 2013

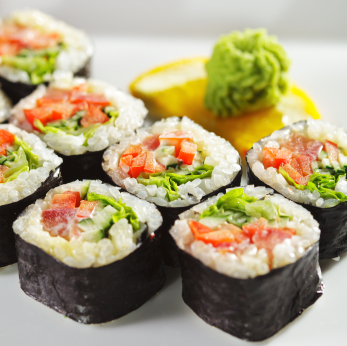
Sushi Health Benefits for People Who Love to Eat


sushi health benefits
Many people who love to eat have often bemoaned the fact that just about everything that tastes good is either fattening or unhealthy. Actually there is a whole selection of tasty food that is not loaded with transfat, sugar and cholesterol. Those who want to indulge their taste buds need only to compare sushi health benefits with the hotdogs and burgers consumed by millions daily to see that indeed there is an alternative for people who want to eat well but eat healthy.

Analyzing Sushi

Sushi consists of protein with omega 3 packed in seaweed and rice. The staple ingredient of sushi is short grain white rice flavored with rice vinegar, salt and sugar. Once cooked, the rice itself is more than 50 per cent water and each 100 grams contains 28.7 grams of carbohydrate, 5.2 grams of fat, and 2.4 grams of protein for a total of 130 calories.

Different types of sushi would have different nutritional and caloric contents depending on the fillings used. A standard California roll, for example, would contain 7 grams of fat, 38 grams of carbohydrates, 5.8 grams of fiber, and 9 grams of protein. The entire roll would be an estimated 255 calories.

A tuna roll is estimated to be around 190 calories with 2 grams of fat, 27 grams of carbohydrate, 3.5 grams of fiber and 24 grams of protein. An avocado roll would contain approximately 28 grams of carbohydrates, 5.5 grams of fiber, and 5.8 grams of fat and 2.1 grams of protein. This roll would have only an estimated 140 calories making it very low calorie indeed. A yellowtail roll would have 245 calories but would also have only 2.6 grams of fat, 37 grams of carbohydrates, 1.9 grams fiber and a whopping 24 grams of protein.

Soya, if naturally fermented, has been linked to lowering the incidence of breast cancer and alleviation of menopause. The other ingredients of sushi each have their plus points: ginger is supposed to aid in digestion and helps in fighting bacteria while wasabi also has anti-bacterial properties. Nori, the seaweed sheet used to cover sushi, contains minerals that are normally found in the ocean such as iodine, magnesium, calcium and folic acid. It also contains Vitamin A, B-complex and Vitamin C.

Omega 3 Fats and Sushi

One of the noteworthy sushi health benefits is that it is generally low in saturated fats. In addition, depending on the filling, it can be high in protein. More importantly however, the sushi rolls that have mackerel and sardine contain significantly high amounts of Vitamin E and Omega3 which are vital to the nervous system. Omega3 fats such as DHA are not only good for the brain, they are good for the cardiovascular system since they are known to increase good cholesterol and lower the bad cholesterol in the body. Some studies even show that Omega3 can be linked to preventing or delaying the progress of Alzheimer’s; to maintaining healthy blood sugar levels and alleviating symptoms of depression and arthritis.

Some people look askance at sushi health benefits and do not like to eat sushi because the filling is usually raw. While it is true that raw fish can contain parasites, a precautionary measure that European restaurants take is to freeze the fish at -20 degrees Centigrade for more than 24 hours. This is known to kill nematode parasites. Others are reluctant to eat tuna because of mercury. A precautionary measure in this case would be to eat tuna with smelt roe, freshwater salmon or Atlantic mackerel since studies show these have lower mercury content.

Although diabetics are advised to go slow on the rice and use low-sodium soy sauce when eating sushi, it is still a far healthier choice than burgers, hot dogs or pizza. As a whole, sushi is food that is low on fat and it has good nutritional value. Moreover, it is kinder to the arteries and never has healthy food come in such an attractive package.

Fresh Start on How to Make Homemade Wine from Fruit


how to make homemade wine from fruit
Fruit wines are wines usually implied by the primary ingredient used in making them - fruits. They are different from country wines, which from the term itself connote the fact that they are not made from grapes. Because of the growing popularity of fruit wine making, there abounds recipes on how to make homemade wine from fruit that offer simple tips and procedures that even those new to wine making can easily follow.

A misconception is that fruit wines can only be made from grapes. The range is large because practically any fruit or non-toxic plant can be used that when done properly produce the same bouquet of aroma and taste as grapes. Before trying your hands at your new found recipe on how to make homemade wine from fruit there are some points to consider first.

Fruit Preparation

The first step in fruit preparation is to sanitize everything. This does not only involve the equipment to be used but the fruits as well. Always choose the best fruits that are ripe because they are juicier. Avoid rotten, bruised and under ripe fruits. The final quality of the homemade wine depends on the quality of the fruits used. Wash them completely and thoroughly including the leaves, pits and stems. Remove bad spots as they may contain bacteria and may cause undesirable taste to the wine.

Slice the fruits into pieces making sure that not a bit of juice is lost. Some fruit juices have much potency in flavor and have higher level of acidity that is why they have to be extracted with water unlike pure grape juice that can be used undiluted. Slightly mash the fruits in a nylon strainer bag. Hang the bag on the side of the fermenter, then mash and squeeze some more for the fruit juice to come out.

Making the Fruit Wine

Stir in the rest of the ingredients: sugar, tannin, acid blend, Campden tablet, and if, required, pectic enzyme. Regulate the sugar level of the fruit juice before fermentation. There are different types of sugar that can be used and each one can affect the quality of the wine. Do trial batches with corn and cane sugar, being the cheapest. Honey is also an option because it provides a better-rounded flavor.

Add the yeast after 24 hours. Many fruits are lacking in yeast nutrients that are important for fermentation that is why homemade wines use yeast to promote this process. When the pulp starts to break, use the hydrometer to have an accurate measurement of alcohol produced when sugar reacts with the yeast. This process of sugar conversion to alcohol is called chaptalization. Determine if more sugar is needed according to your taste preference. In a week's time, the "must" reaches an SG of 1. 3“ 1.040. Remove the fruits and siphon off the wine into a glass carboy to continue fermentation. When the SG is down to .990 "“ 1.000, rack the liquids into another clean carboy with air lock. By this time, the wine is getting clearer. Clearing agents may be added or simply allow the wine to clear by itself. The latter is highly recommended because allowing the wine to clear naturally takes longer to set and age thus making the wine tastes better. This process promotes esters development, which is good in making the taste mellower.

You have just made your first homemade wine. It is your preference to make final adjustments and amendments to the fruit-based wine before putting them in bottles. If you come up with a new idea to improve the blend, make experiments in small batches to avoid spoiling the whole batch. When your friends ask for tips, you can now exude that self-confidence to teach them how to make homemade wine from fruit without spilling an ounce of error.

Thursday, March 21, 2013

Wake Up to the Aroma of Freshly Brewed Coffee with these Drip Coffee Makers


drip coffee makers reviews
For hundreds of years, people all over the world used a very simple process for making coffee. In the past, people considered it adequate to add ground coffee to hot water in a pan, boil it until it smelled perfectly right, and pour the brew into a demitasse. However, the process of making coffee has been changed over the years with the invention of coffee makers. Also known as coffee machines, coffee makers are cooking appliances used to brew coffee without needing to boil water in a separate pot or pan. Different brewing principles gave rise to the numerous types of coffee makers in the market. The process of drip brewing, which is now more than 125 years old, is considered the first modern method of making coffee and is what gave birth to drip coffee makers.

Drip coffee makers are electric coffee machines that heat up cold water from a chamber and pump it through coffee grounds held in a filter basket. Then they drip the finely brewed coffee into glass pot, where the special liquid is kept warm. Drip coffee makers are among the most popular and simplest ways to make coffee for people who are always in a hurry. Used and cared for properly, they can make a great-tasting cup of coffee.

There are literally hundreds of drip coffee makers that one can buy in the market. The overwhelming number of products plus the fact that you can't try it out in the store make decision-making a really tough job. Given the numerous items to choose from, how do you make a buying decision?

First, the best coffee makers aren't cheap. When buying a drip coffee machine, remember to choose a brand or company that has been proven to provide quality machines throughout the years. The Rancilio Silva is an example. Not cheap, but tested to give you product satisfaction and of course, the best coffee brew every morning.

Next, take a look at the features of the coffee maker and see if it fits your needs. How many cups do you intend to brew most of the time? Do you want one that has a thermal pot to keep your special coffee warm? Do you want a coffee maker that has thermostat so you can adjust the temperature to your liking?

Of course, consider the price. Sure there are hundreds of drip coffee makers out in the market, but which unit fits your budget? If you're planning to get a coffee machine that is quite cheap, check out several consumer reviews online before buying and see if you don't have to pay double for a low-quality machine. As some would say, those who buy cheap pay twice. It may not always be true, but the thought is worth considering.

If you're too busy to scour the market to look for a drip coffee maker that will make you the best cups of coffee for breakfast, here are some machines that make drip brewing a convenient task.

  • Kitchen Selectives Single Serve Drip Coffee Maker

Enjoy that good cup of morning coffee using this simple and easy single-serve drip coffee maker. With its sleek black design, removable filter basket, and one-cup capacity, you will definitely enjoy your home-made cup of coffee with virtually no waste.

  • Mr. Coffee Drip Coffee Maker

This drip coffee maker will make up to 12 cups, but you can adjust the settings if you only want a cup or two. All the standard features are present too, but you can take advantage of the Pause 'n Serve capability which allows you to grab a cup of coffee while the rest of the pot is still brewing.

  •  Delonghi 12-Cup Drip Coffee Maker DCF212T

The best thing about this coffee machine is the aroma button which enhances your morning coffee's flavor and aroma. This feature time-releases water to saturate coffee grounds slowly to create a more flavorful taste. It also has a 24-hour programmable timer that features a 2-hour automatic shut off.

If you're a beginner, putting a drip coffee maker in the kitchen is a must. There are various kinds of coffee machines out there but drip coffee makers are definitely the foundation of home coffee making.

Wednesday, March 20, 2013

Preparing Healthy Bestseller Smoothies for Kids


homemade protein shakes for kids
Sometimes children can be so picky mothers find themselves at a loss as to how to get them eat. If you yourself are in this position, be consoled by the fact that most kids will drink a smoothie with gusto. All you need is a few tips on how to prepare surefire bestseller smoothies for kids.

What to Put in Smoothies for Kids

In terms of nutrition, you want to avoid putting too much fat and sugar into your children’s smoothies. What you do want to include is as much of their daily requirement of calcium, protein and some healthy carbohydrates. In order to accomplish this, you can use yoghurt as the base of your smoothie and put fruit in. To make sure your child gets protein in his or her smoothie, you can use yoghurt, skim milk, soya milk or almond milk. You may even want to include some commercially prepared breakfast mix with vitamins and minerals to enrich you smoothie.

You can use fruits or frozen juice for vitamin C in your children’s smoothies. Here’s a deep, dark secret: you can also smuggle in some veggies in the process. Carrots and beets are easy to smuggle into a strawberry or cranberry smoothie so that apart from anti-oxidants, the beverage has a good dose of magnesium and potassium. When you use fruits in smoothies, include the skin when this is edible to supply fiber.

Inviting Your Child to be Part of the Process

It is even easier to get children to take smoothies when you let them to take part of the preparations. Allow them to pick the fruit and the juice you will be using. If they are old enough, let them put the ingredients into the blender or pour the smoothie into glasses. Ask them after if they think you should add more fruit or juice or milk. These simple acts will make the food more attractive to them.

A Few Foolproof Recipes

To start you off on your smoothie path, here are some simple recipes you can try. The ingredients for each smoothie are different but the procedure is the same for all three. Revise them according to what is available in your market then go ahead and have fun.

Golden Smoothie

Ingredients:

  • 1 cup peach or apricot or mango or pineapple (combinations are fine)
  • 1/2 cup carrot
  • 1/2 cup nonfat yoghurt
  • 1/2 cup crushed ice
  • 1/2 almond milk (nonfat milk is also fine)
  • 1 tablespoon light colored honey (optional)
  • 1 teaspoon protein powder
  • 2 drops vanilla

Strawberry Smoothie

  • 1 cup strawberry
  • 1/2 cup cooked beets
  • 1/2 to 1 cup banana
  • 1 cup nonfat yoghurt
  • 1/2 cup crushed ice
  • 1/2 almond milk (nonfat milk is also fine)
  • 1 tablespoon light colored honey (optional)
  • 1 teaspoon protein powder
  • 2 drops vanilla

Chocolate Smoothie

  • 1/2 to 1 cup chocolate syrup
  • 1 tablespoon peanut butter (omit if your child is allergic)
  • 1 banana
  • 1/2 cup steamed and drained spinach
  • 1 cup nonfat yoghurt
  • 1/2 cup crushed ice
  • 1/2 - 1 cup almond milk (nonfat milk is also fine)
  • 1 tablespoon light colored honey (optional)
  • 1 teaspoon protein powder
  • 2 drops vanilla

Procedure for all three:

Peel and cut fruit into small pieces. Put all ingredients together and blend till smooth. Serve with a straw.

Perhaps the only caveat for smoothies is that they could encourage children to develop a palate more attuned to sweet rather than savory foods so it is good to give children opportunities to sample other foods as well. As a rule though, because kids love smoothies, you can make these a regular treat especially for those who are hard to feed. Smoothies for kids present parents with a fun and delicious strategy to ensure that children get the nutrition they need.

Thursday, February 28, 2013

A Barbecue Sauce Recipe You Can Use in Countless Scrumptious Versions


barbecue sauce recipe
There are countless ready-to-use barbecue sauces in the market today and if you are fond of barbecue, you have probably tried several. You may even have found a favorite brand to use regularly and figured out a way to enhance its flavor by adding lemon or garlic or a combination of other ingredients. There may be times, however, when you wish you could have your old favorite and still serve something new all in one occasion. If so, here’s a barbecue sauce recipe that might work for you and help turn your regular barbecue into a mini barbecue buffet!

The Basic Sauce

In a blender, puree a small onion, half a head of garlic and 1/3 cup of brown sugar. Pour into a bowl and add 1 cup of ketchup, 1 teaspoon mustard, 1 teaspoon Worcestershire sauce, and 1/3 cup of lemon juice. Mix well. This is your basic sauce and you can use it as is. You can also divide this into two or three portions and flavor each one differently.

The Asian Variation

To your basic mix, add 1 tablespoon minced ginger, 2 tablespoons Japanese soy sauce, 1/4 cup rice wine, and 3 tablespoons of sesame oil. Marinate the meats you choose to serve with this Asian flavor for at least one hour, barbecue, and serve.

A Hint of Sate

To your basic mix, add 1/3 to 1/2 cup of peanut butter, 1 teaspoon tamarind sauce, 1 tablespoon sate sauce and the juice of one lime. It is important to slice your meat a little on the fine side because the peanut butter makes this recipe for barbecue sauce burn rather quickly. The tamarind sauce and the sate sauce are both available in Asian groceries in the US. Be sure to refrigerate once you have opened their bottles.

A Breath of Creole

To your basic mix, add your Creole seasoning. You can make this yourself by mixing 1 1/2 teaspoons ground black pepper, 1 tablespoon paprika, 2 teaspoons dried oregano, 2 teaspoons dried thyme, and 2 teaspoons cayenne pepper. If you intend to serve a Creole variation for your barbecue, you won’t go wrong by throwing in some sausages along with your beef.

A Trace of Mexican

Finely chop three tablespoons of cilantro. Throw this into your basic mix and add 1/2 to one teaspoon cumin, a teaspoon of white pepper, and half a teaspoon of cinnamon. You may also want to put a dash or more of taco flavoring.

A Touch of Thai

You can convert your basic sauce so that it has a touch of Thai in it by adding the juice of one lime, a heaping tablespoon of sugar, a tablespoon of fish sauce and two tablespoons of finely chopped ginger. Many Thai dishes are traditionally hot but you can make your Thai version as hot or as mild as you want. If available, one crushed lemongrass stem will go a long way towards bringing a taste of Siam to your sauce.

Adapting the Sauce to Your Own Taste

Some kitchens develop a fine reputation for their distinctive barbecue sauce. You can become known for having barbecues that provide a mélange of exotic flavors side by side with the fondly familiar tastes that come off the grill. If you decide to use this barbecue sauce recipe, try the basic version on a small amount of meat before using it for a big party. Then, as today’s foodies would put it, tweak it so that it suits your palate. Add pepper or nutmeg or balsamic vinegar- whatever strikes your fancy after you have tested it on your grill. Be the judge of how hot, how sweet or how salty you want your sauce to be. Reduce or add to the ingredients listed, be adventurous enough to make this sauce your very own then grill away and have fun!
Related Posts Plugin for WordPress, Blogger...